Tracking Extension Guide
This guide provides comprehensive information for implementing the Magebit Tracking Extension, including prerequisites, installation, configuration, and server-side GTM setup.
Prerequisites
Required Components
PHP 8.1 or higher - Minimum PHP version requirement for the extension.
magebitcom/magento2-core - Necessary for the Magebit tab created in system configurations.
PHP ext-curl - Required for communication with the server-side GTM.
Recommended Components
hyva-themes/magento2-theme-module - Some functionality relies on Hyva. Luma compatibility coming soon.
hyva-themes/magento2-hyva-checkout - Required for add_shipping_info and add_payment_info events.
Installation
Install the Tracking extension using Composer.
Installation Command:
composer require magebitcom/magento2-module-trackingPost-Installation Steps:
bin/magento setup:upgradeGit Errors: If there are git errors indicating the directory doesn't exist or there's a typo, request to add your project to Magebit Packeton.
Server-Side Tagging Setup: To setup server-side tagging, follow the server-side tagging guide.
Configuration
Access Configuration
Tracking extension configuration is located under Stores > Settings > Configuration > Magebit > Tracking.
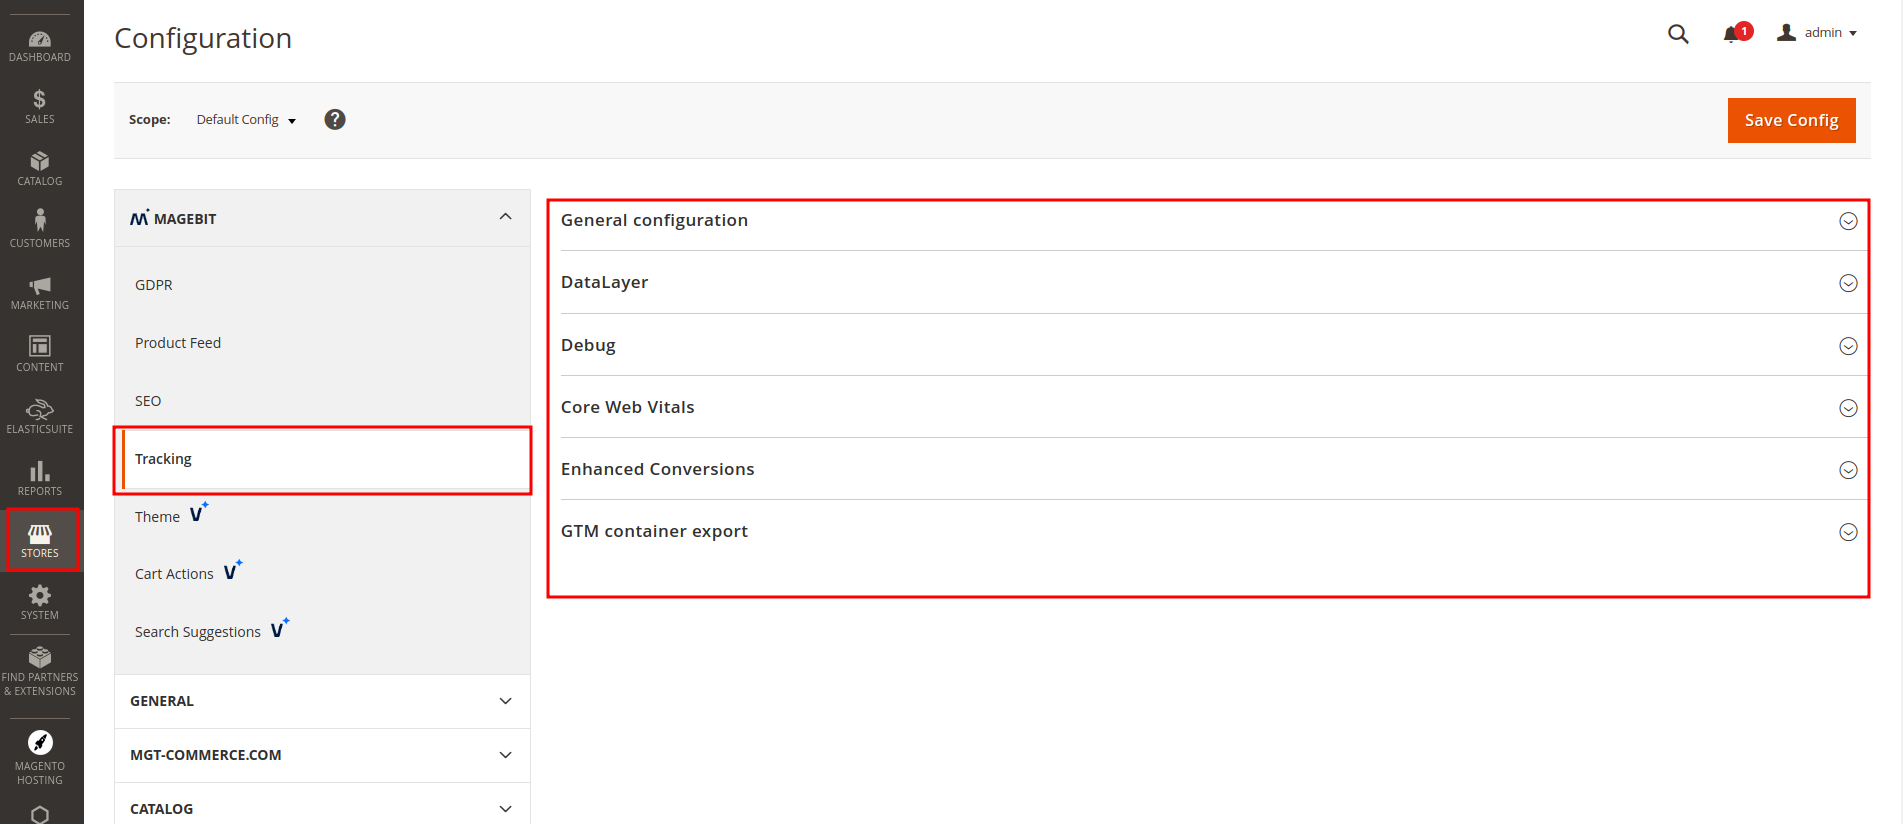
Configuration Sections
General Configuration: Basic tracking settings and extension enable/disable options.
DataLayer Configuration: Data layer events and tracking parameters setup.
Debug Settings: Debugging features for troubleshooting and testing.
Core Web Vitals: Core Web Vitals tracking and monitoring configuration.
Enhanced Conversions: Enhanced conversion tracking setup for improved accuracy.
GTM Container Export: Google Tag Manager container export and configuration.
Testing
Comprehensive Testing Guide
For in-depth testing of events, use the extended testing guide which features the base configuration necessary for testing locally, on staging, or production.
Testing Process:
- Validate that all events are working correctly
- Verify event structure is correct
- Ensure events receive 200 status codes from GTM
- Test server-side GTM implementation (if not using Measurement Protocol)
Server-Side GTM Testing: After validating client-side events, test the server-side GTM implementation. If Measurement Protocol is chosen, testing the ssGTM is unnecessary.
Server-Side GTM
Overview
Server-side GTM provides enhanced tracking capabilities by processing data on a dedicated server before distributing it to various measurement protocols.
Key Benefits:
- Performance Improvement - Reduces client-side script loading
- Enhanced Security - More secure data transfer
- Ad Blocker Resistance - First-party scripts harder to block
- Hybrid Setup - Supports both client and server-side data collection
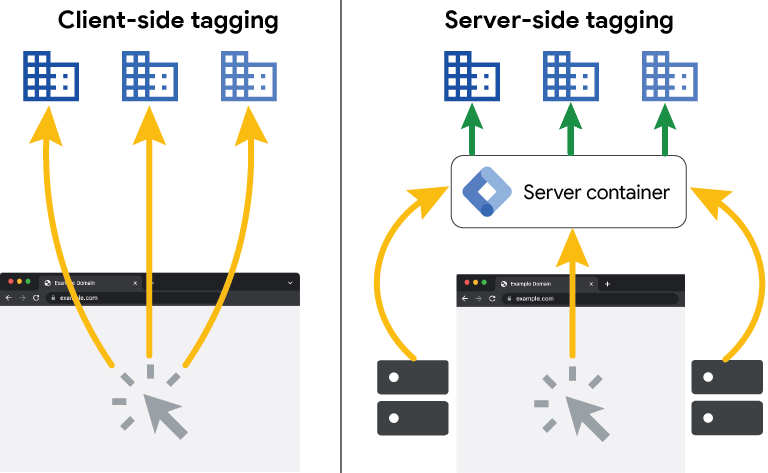
Client-Side vs Server-Side Tagging
Client-Side Tagging:
- Multiple measurement protocols (GA4, Meta Pixel, Twitter Pixel) load directly on website
- Slows down website performance
- Higher risk of ad blocker interference
Server-Side Tagging:
- Single request to tagging server
- Server processes and distributes data to measurement protocols
- Improved performance and data accuracy
- Enhanced privacy compliance
Server-Side GTM Interface
Access Server-Side GTM: Navigate to GTM, choose your project or create a new one, and select the server container.
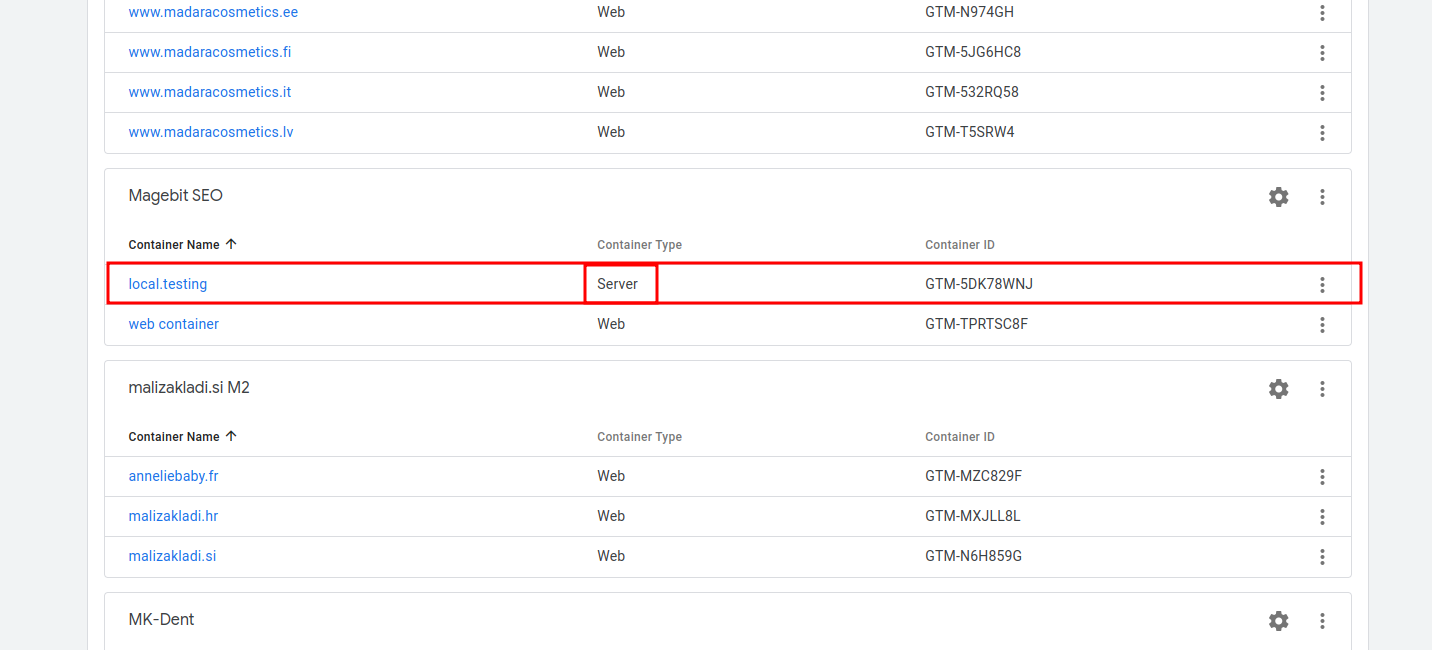
Server Container Features: When clicking on the server container (e.g., "local.testing"), you'll see the regular GTM interface with additional options:
Clients: GTM uses clients to capture requests made to the tagging server. They capture data and process it for correct format.
Transformations: Allow removal, addition, or modification of data in tags.
Tags, Triggers, and Variables: Same functionality as regular web GTM.
Templates: Place to create, import, or edit clients, tags, triggers, variables, etc.
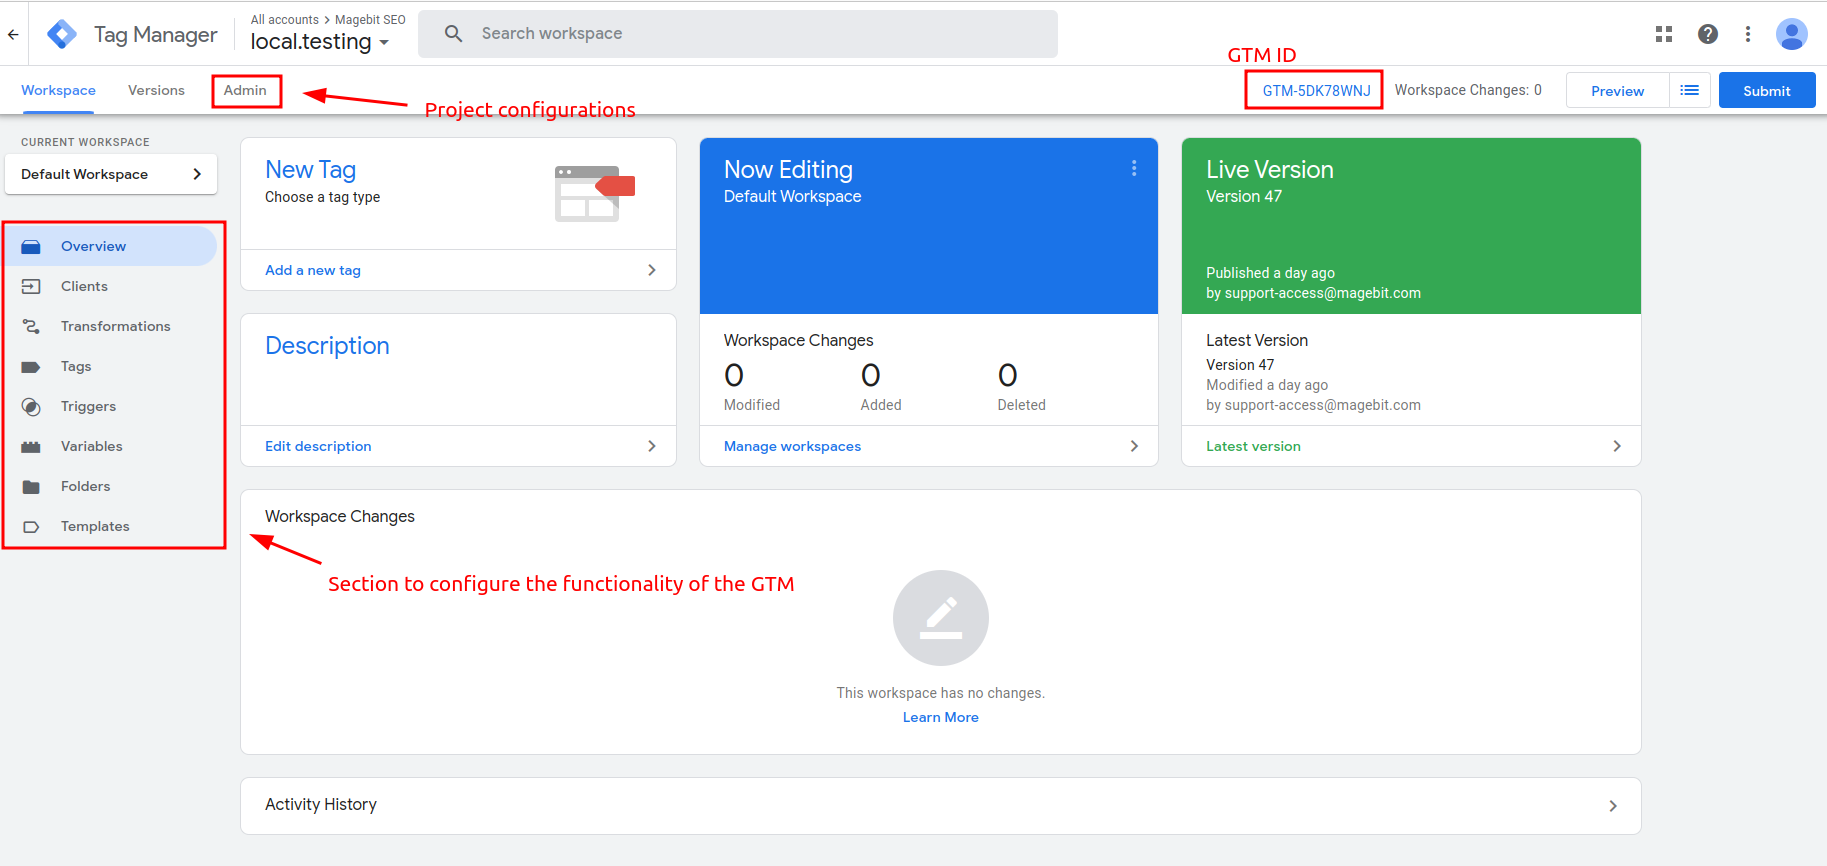
Server-Side GTM Configuration
Configuration Steps:
- Navigate to admin section for project configurations
- In Magento system configuration, find GTM container export section
- Fill out required data and download tagging server template
- In admin section, press "Import Container" and select downloaded .json file
- After successful import, explore workspace options
Container Settings: For the tagging server to work, connect your tagging server with GTM:
- Go to admin section and press container settings
- Add server container URL for automatic detection in preview
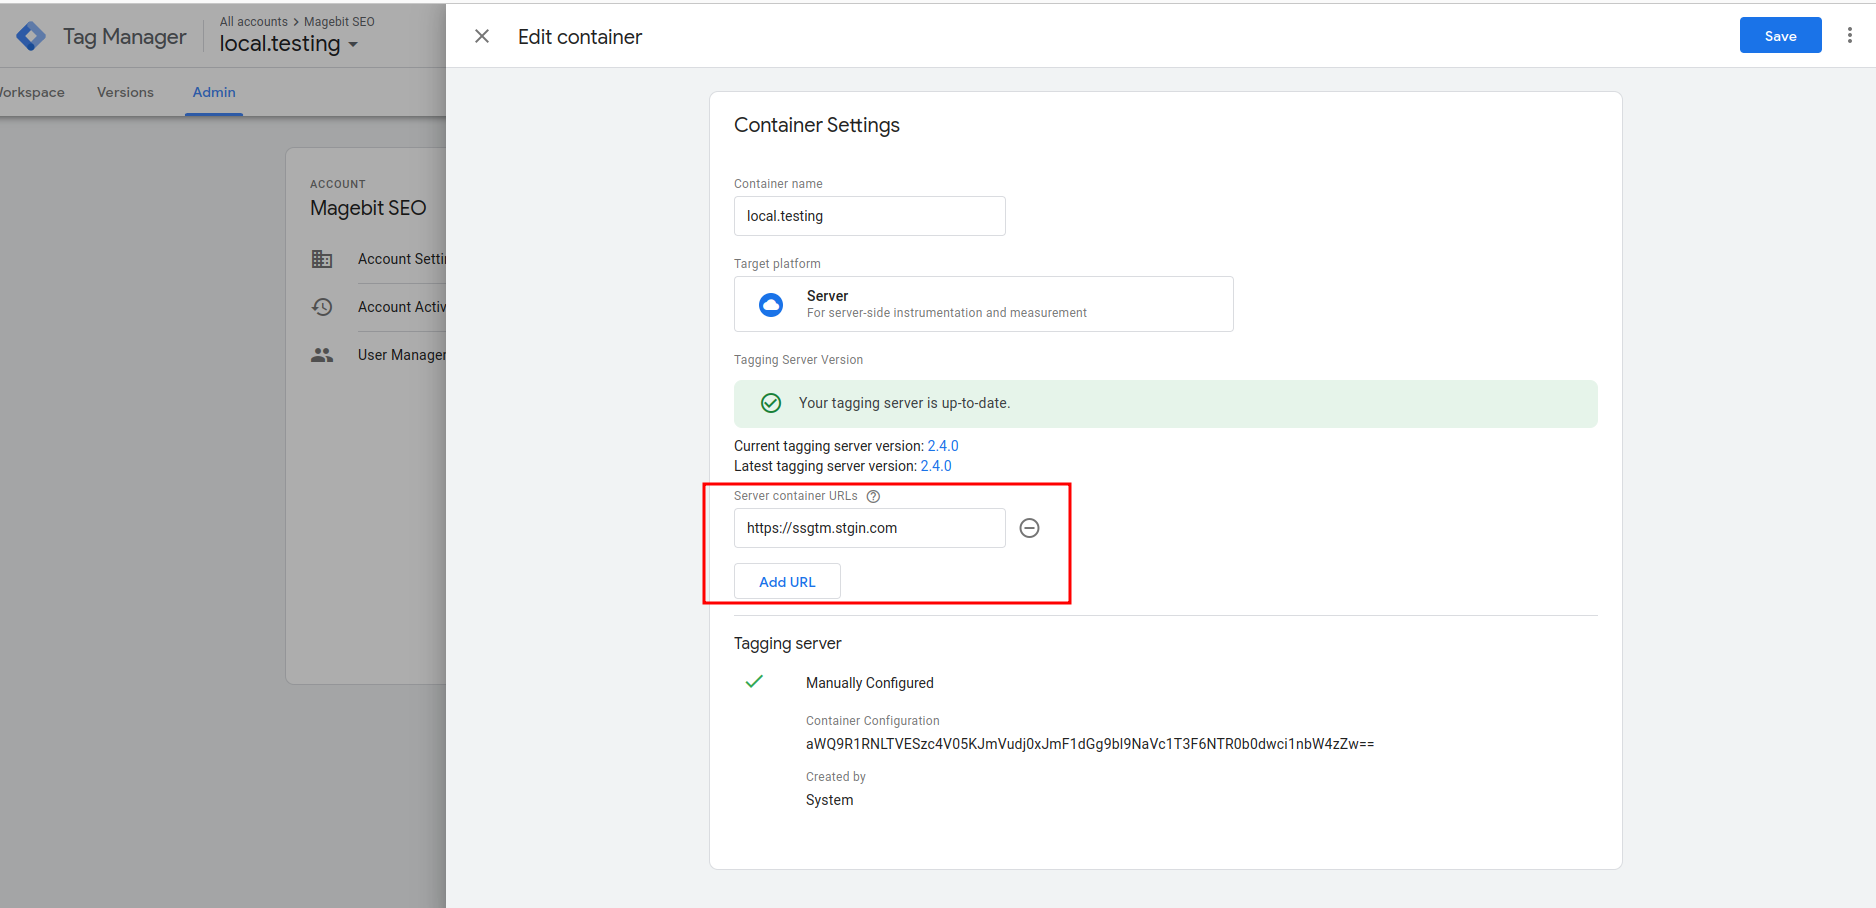
- Save changes, go back to workspace, and press "Submit" in top right corner
SGTM Preview for Debugging and Testing
Preview Mode:
- Press "Preview" button next to "Submit" button
- You'll be redirected to tagging server preview mode
- Press three dots at top right corner and select "Send requests manually"
- Copy example curl command and paste in terminal
- Submit to see server received your request
Website Event Testing:
- Go back to "Send requests manually" section
- Copy preview header and paste in Magento configurations
- Save and clean cache
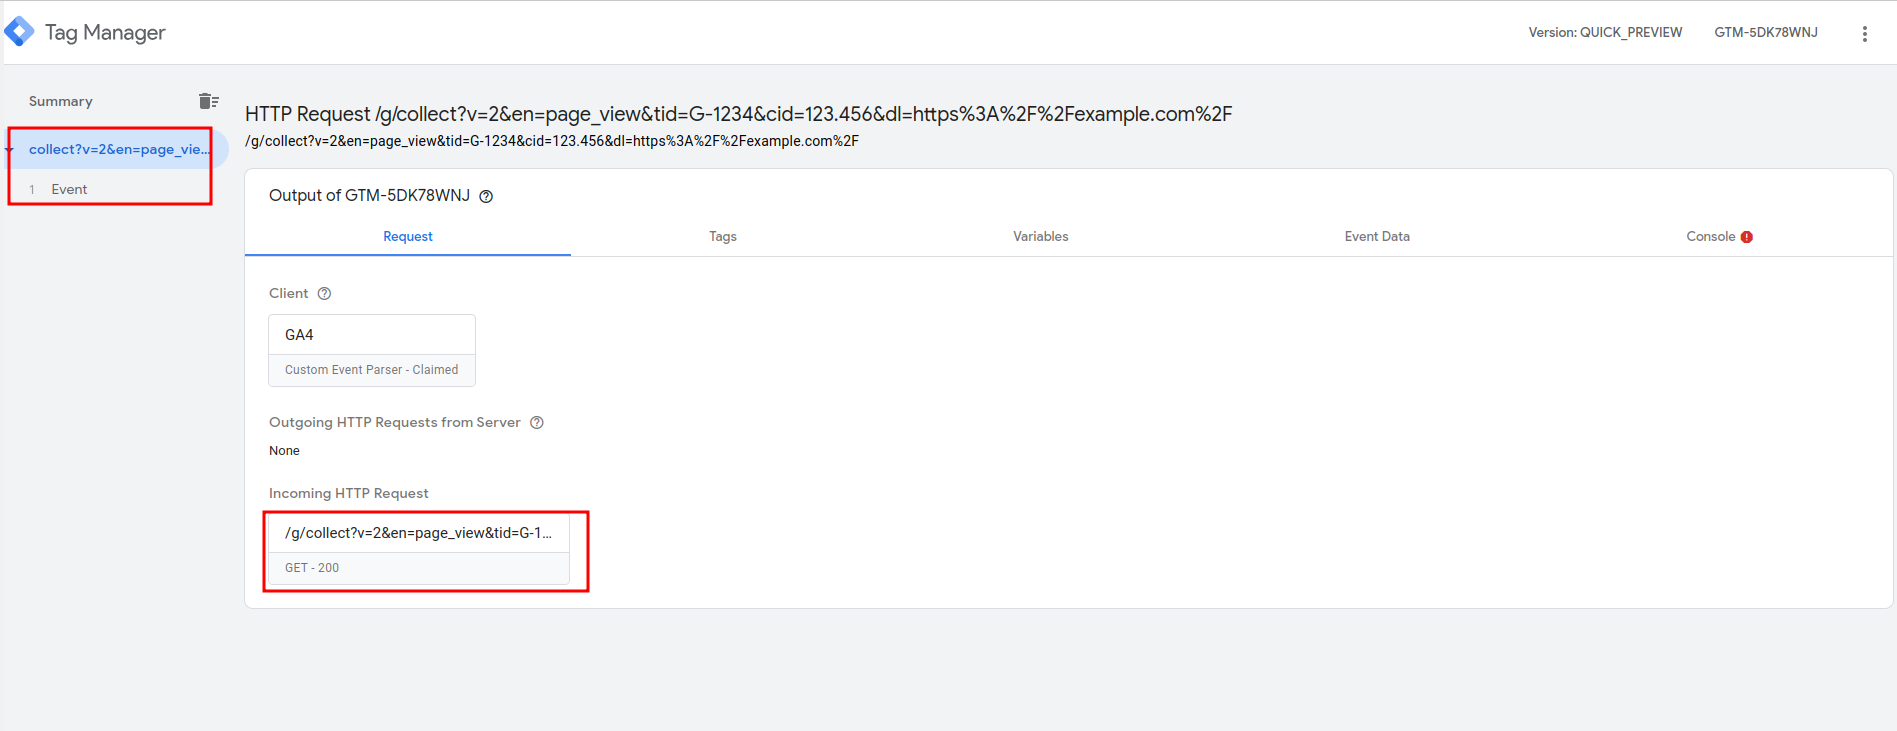
- Start interacting with website to see events coming in
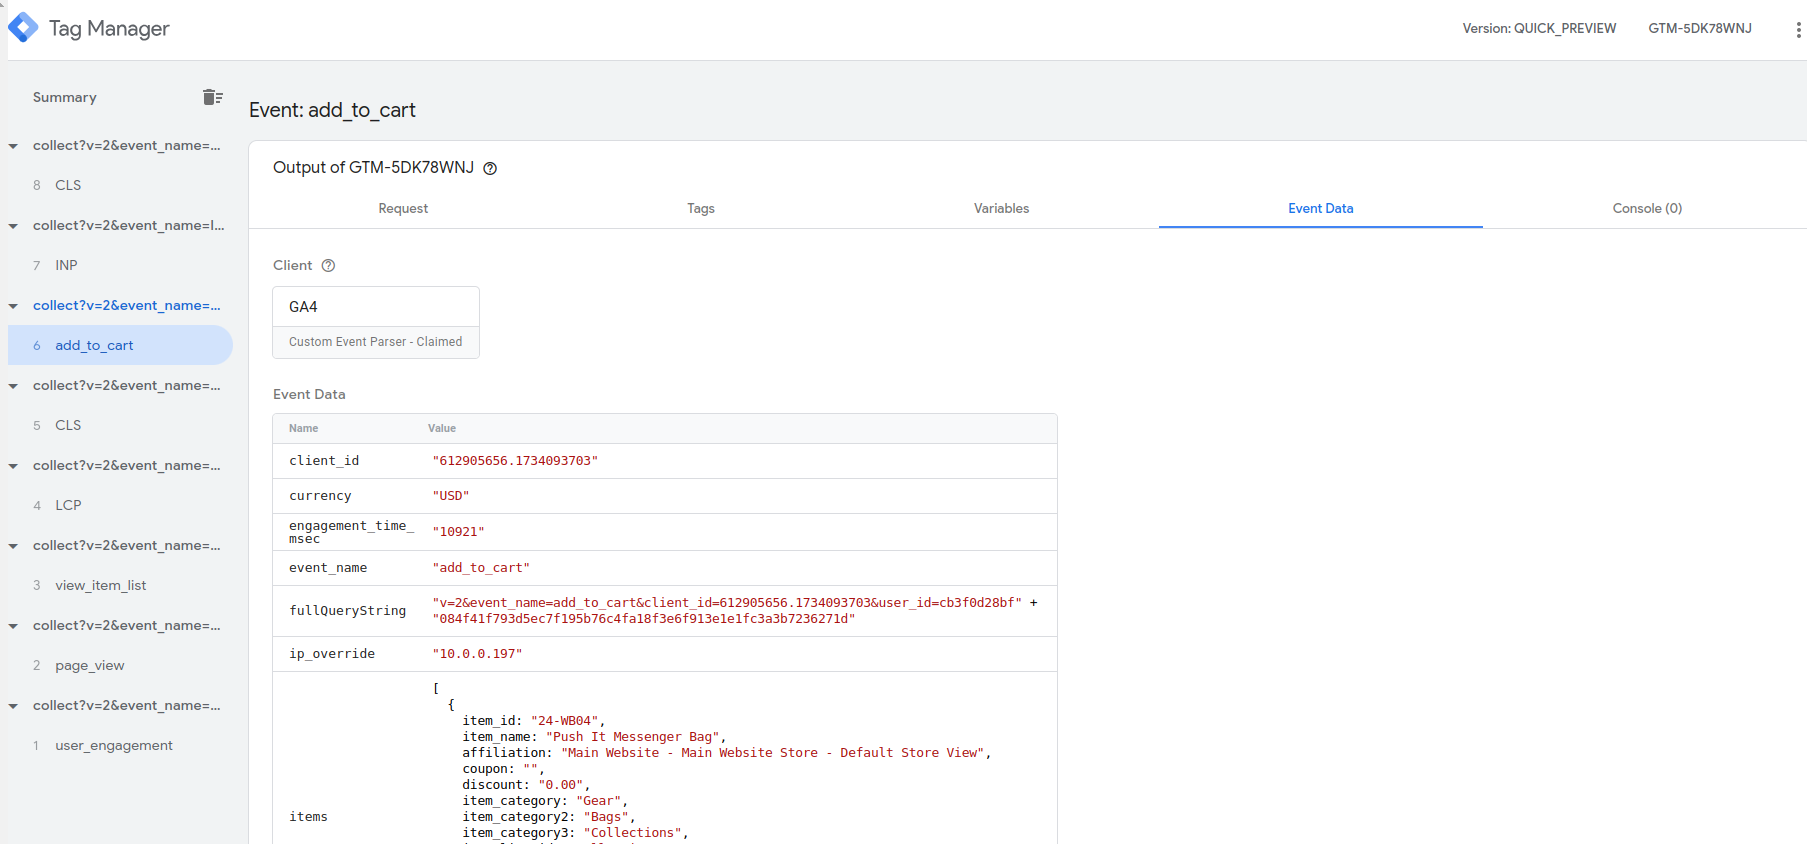
- View event data under "Event Data" section
- Check which tags triggered by going to "Tags" section
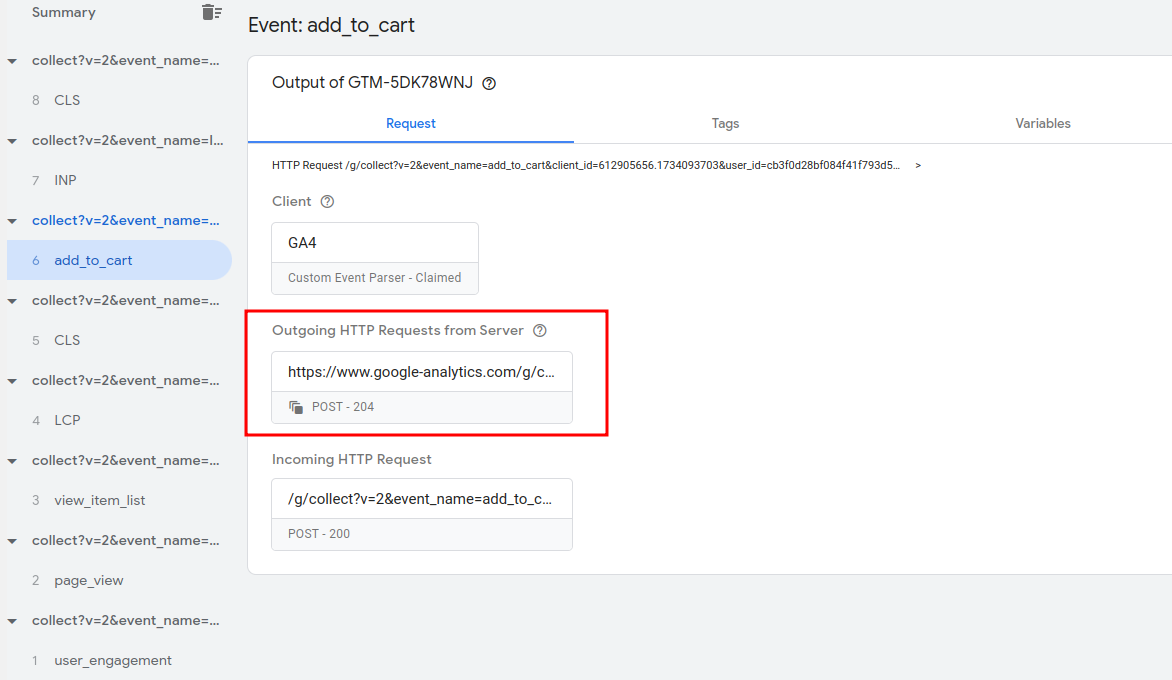
Request Analysis: When going to specific event's "Request" section, you can see Outgoing HTTP Requests. If configured correctly, there will be one for GA4.
Testing on GA4
GA4 Validation:
- Go to GA4 and select your project
- Navigate to Reports > Realtime overview
- You'll see events coming in from sGTM
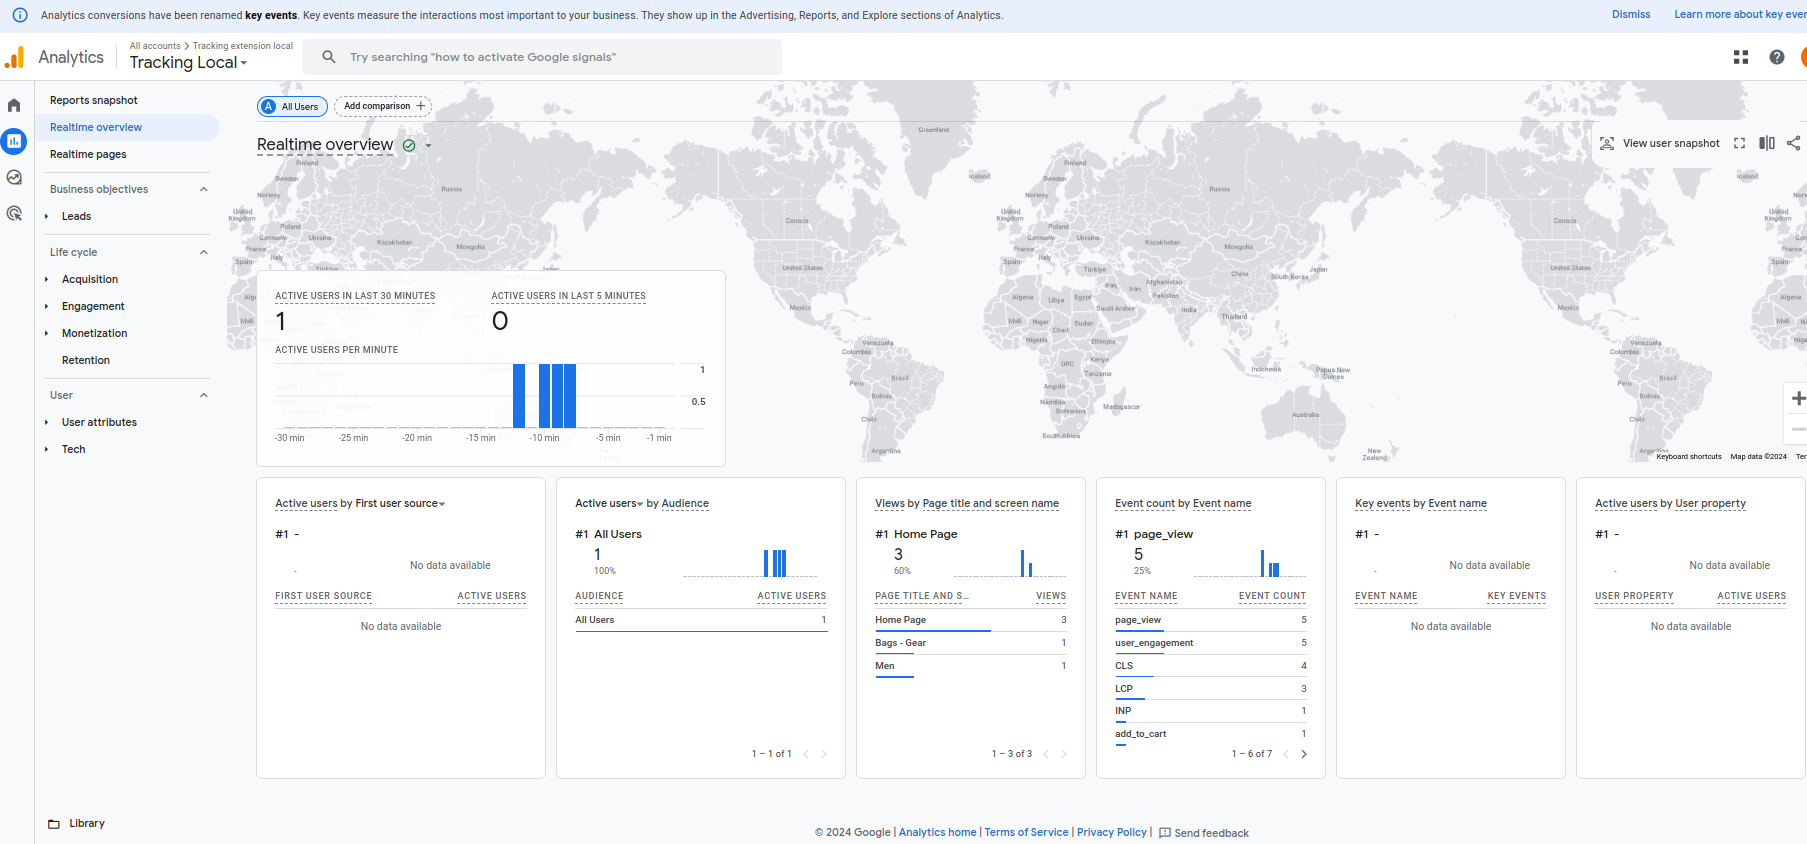
Event Verification: Events with "collect" are coming from dataLayer, while events with "track" are coming from server. Review Event Data to see what's sent to GA4 and verify events are received in GA4 real-time view.
