Tracking Extension Setup
This guide helps developers set up the Tracking extension. This guide assumes that the tracking extension has already been installed.
Configuration Routes
There are two routes for configuring the tracking extension:
Measurement Protocol
Measurement protocol approach sends data directly to GA4 without loading any gtm.js scripts, making it very fast. This is a good solution if the client only needs to track event data and check how users are interacting with the site.
Limitations:
- Event data cannot be sent to other measurement protocols like Meta Pixel or Twitter Pixel
- Enhanced conversions and Google Ads implementations don't work
Server-Side GTM Solution
Server-side GTM solution works by sending all event data to the ssGTM, which then reuses the same data to distribute it to all measurement protocols and Google Ads.
Server-Side GTM Setup
Step 1: Create GTM Account and Containers
Access Google Tag Manager: Go to Google Tag Manager and login as support/project/growth access.
Create New Account: Create a new account for the client if one doesn't already exist.
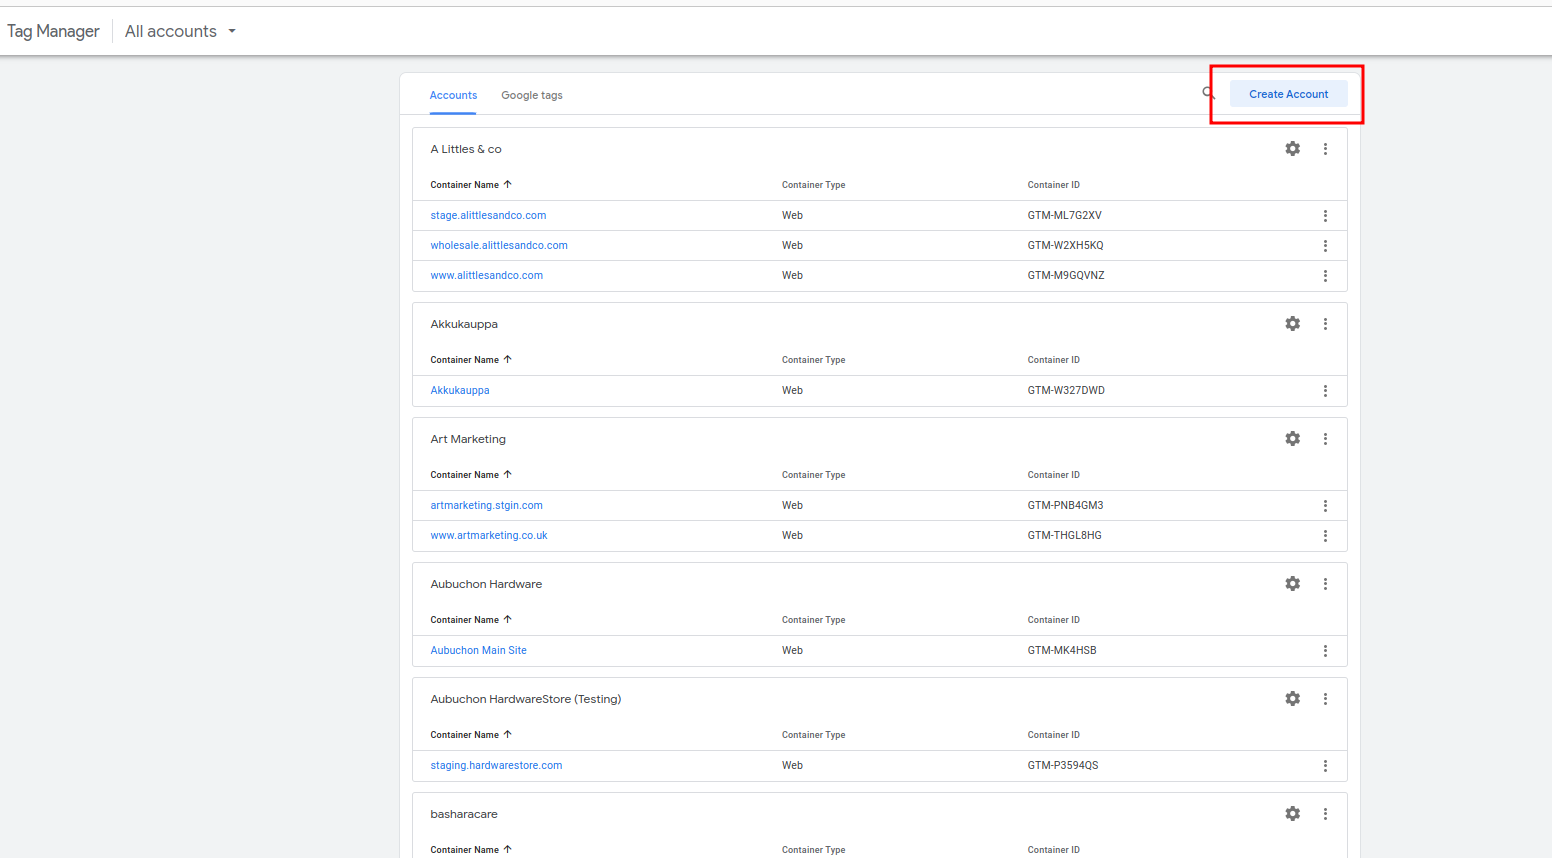
Create Server Container: When creating a new account (or if client has account, create a new container in the account), choose "Server" for tagging platform.
Create Web Container: Go back and create another container under the same account but choose "Web" tagging platform.
Step 2: Create GA4 Property
Access Google Analytics: Go to GA4 and create a new account if one doesn't exist.
Create Property: In the account, create a new property (use support/project/growth access).
Step 3: Set Up Server Hosting
Use Stape for Hosting: The best way to host the server-side GTM is to use Stape. Ask the client to create an account or create a temporary account for free using your Magebit email address.
Create Container: Go to sGTM and press "Create container".
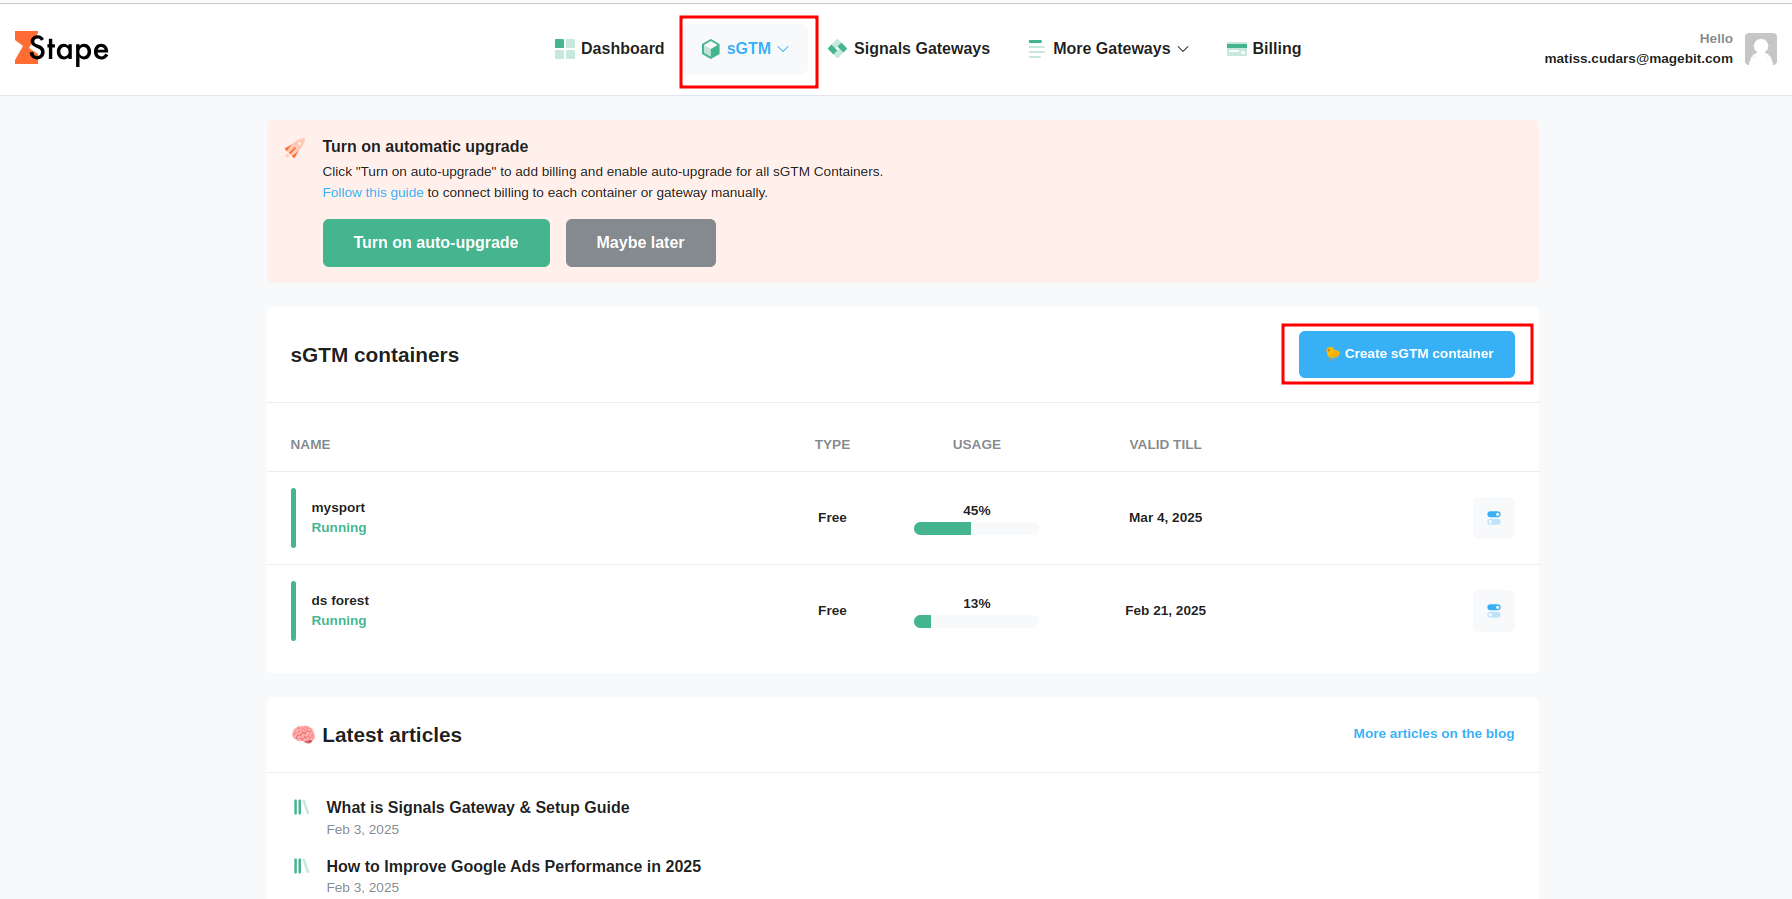
Enter Container Name: Enter the name of your container (you can use the project name).
Get Container Configuration: To get the container configuration string:
- Go to your server-side GTM container
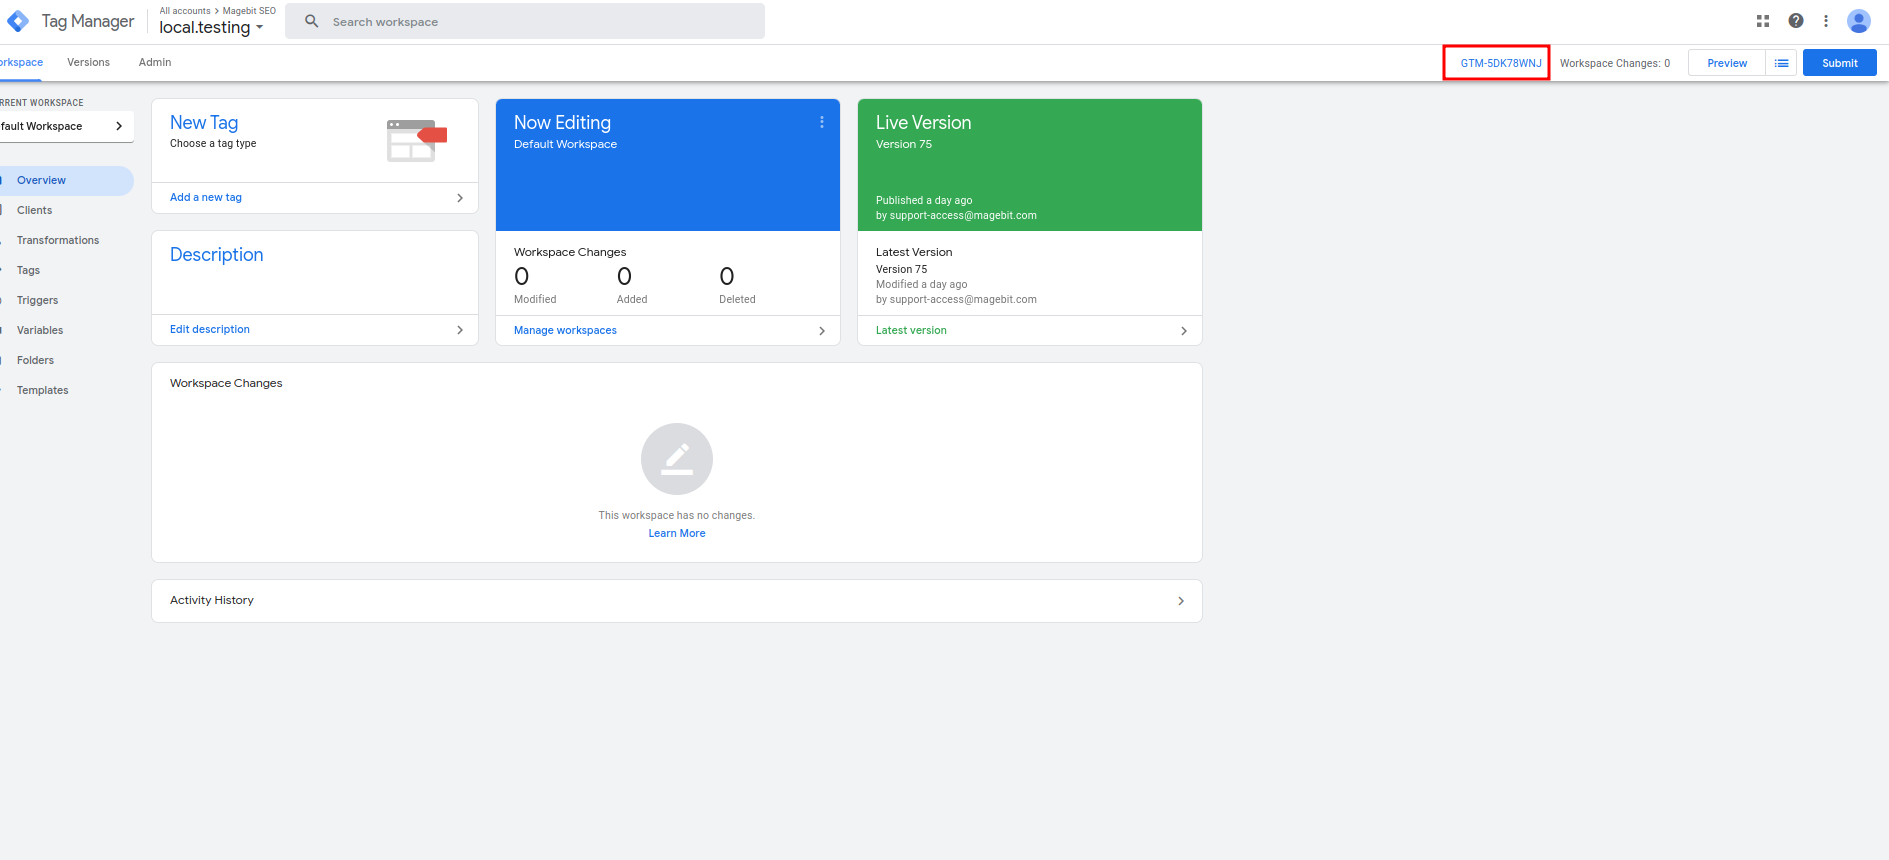
- Press on the GTM key (top right corner, looks like GTM-XXXXXX)
- Choose "Manually provision tagging server"
- Copy the container config
- Paste the config into Stape
Select Location: Enter the closest location of your server.
Choose Plan: For testing, you can use the free plan. However, when going live, it's best to choose a paid plan as requests can add up.
Billing Information: In the billing info page, you can just press "Back to sGTM container" if you're using the free plan.

Step 4: Configure Server-Side GTM
Export Template: To configure the server-side GTM container, export template tags/variables/triggers/clients/etc. and import them in your project.
Access Magebit SEO Account: In the support-access GTM, find the account called "Magebit SEO" and click on the server GTM container.
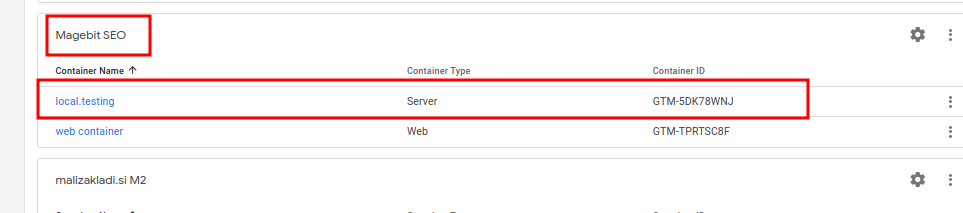
Export Container: In the container, go to Admin > Export Container > choose "Default workspace" > Export.
Replace Template Values: Now replace all template container values with your new server-side GTM values.
Copy GTM Key: Go to your server-side GTM and copy the GTM-XXXXXX key.
Replace Values: Replace all GTM-XXXXXX values in the json file with your container value. Use PhpStorm to Ctrl+F and Ctrl+R to replace values.
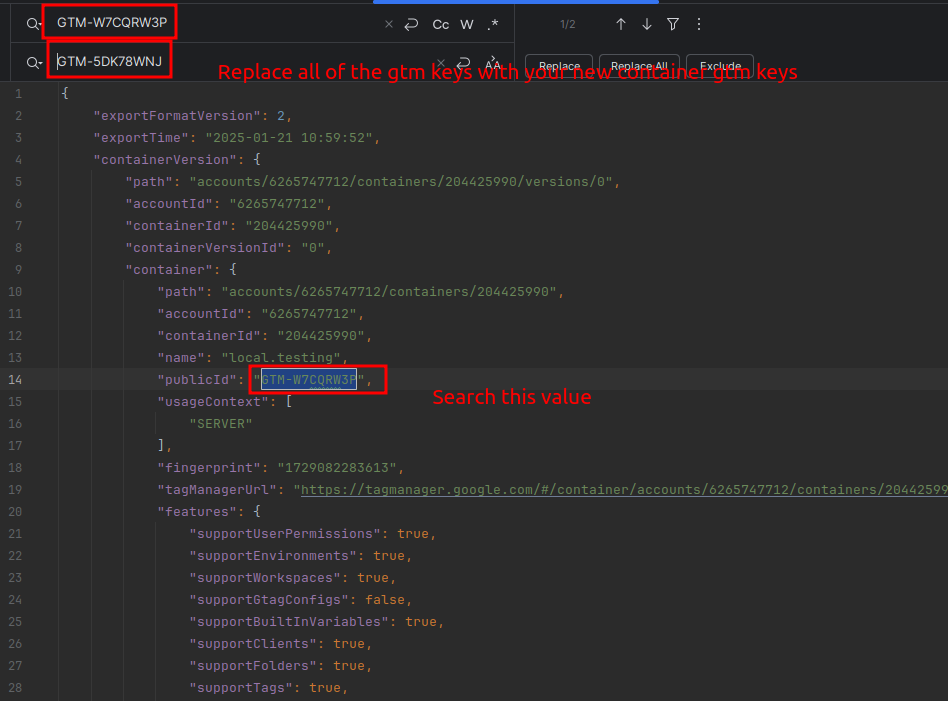
Replace Account and Container IDs: Do the same for the accountId value and containerId value. The new values can be copied from the server-side GTM URL.

Search and replace all values in the json file.
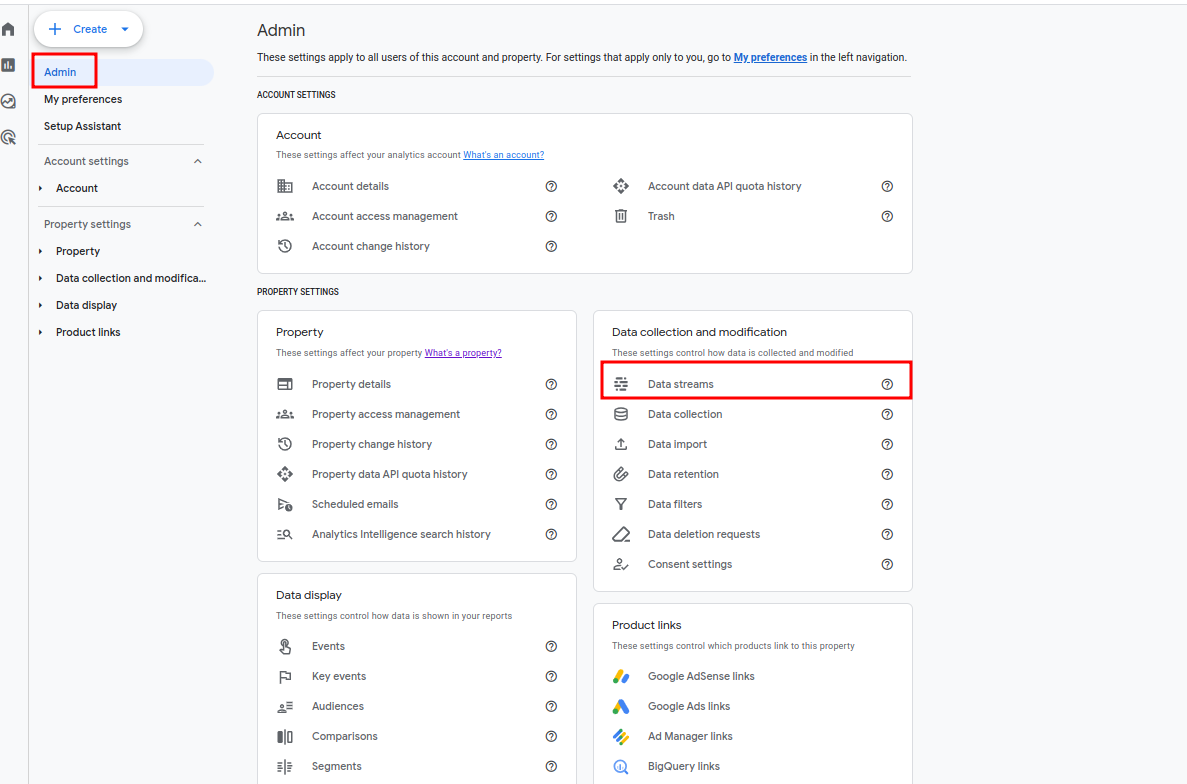
Replace Measurement ID:
- Go to GA4 property > Admin > Data collection > Data streams
- Select the data stream and copy the measurement ID
- In the container template file, search for value like "G-"
- Replace the template measurement ID with your new Measurement ID
Import Container: Save the file and in your server-side GTM admin section, press "Import container".
Import Options:
- If this is a new container, leave the override option
- If this is an existing container, choose merge option to keep old tags/variables, etc.
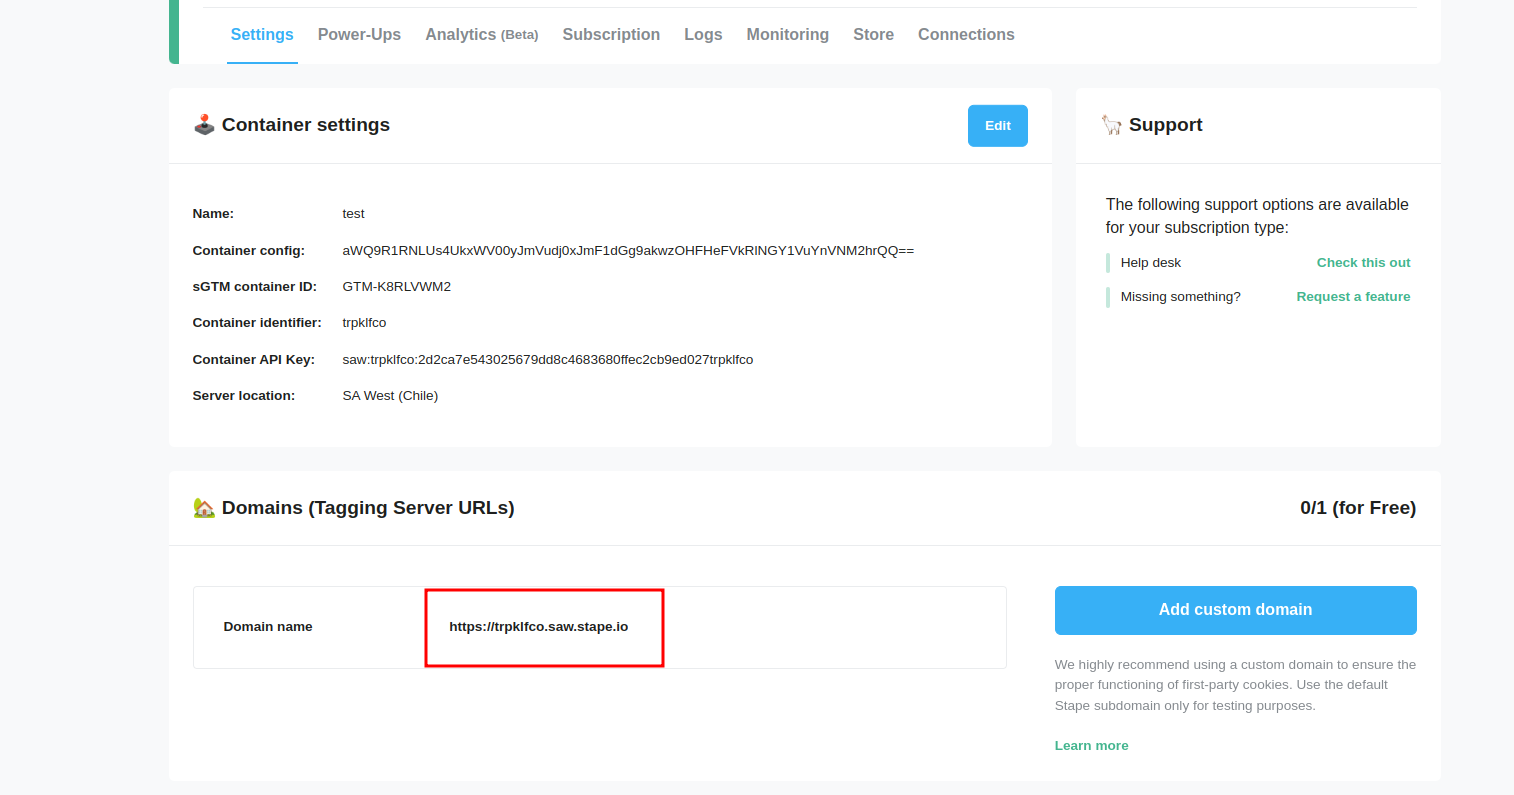
Add Server URL: When new tags are imported:
- Go to admin section > container setting > press "Add url"
- Insert the Stape tagging server URL
- The URL can be found under container settings in Stape
Update GTM Keys:
- Use search bar in server-side GTM to search for "gtm-"
- Change GTM key values to be your web GTM server keys
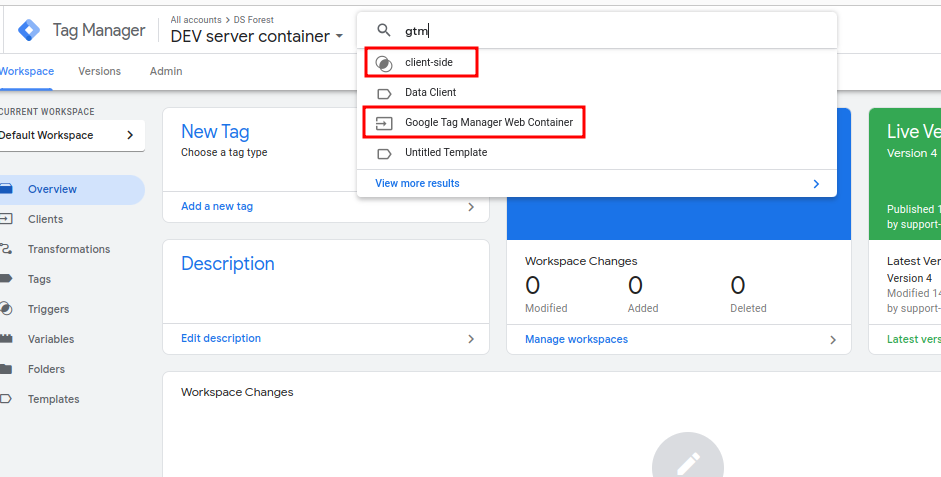
The web GTM keys can be found in your web GTM container top right corner, just like in the server-side GTM.
Publish Changes: In the workspace tab, press Submit > Publish.
Step 5: Configure Web GTM Container
Export Web GTM Template: Export the web GTM template from "Magebit SEO".
Replace Values: In the JSON file, replace these values: GTM key, account ID, container ID, measurement ID.
Import Container: Import the container in your web GTM.
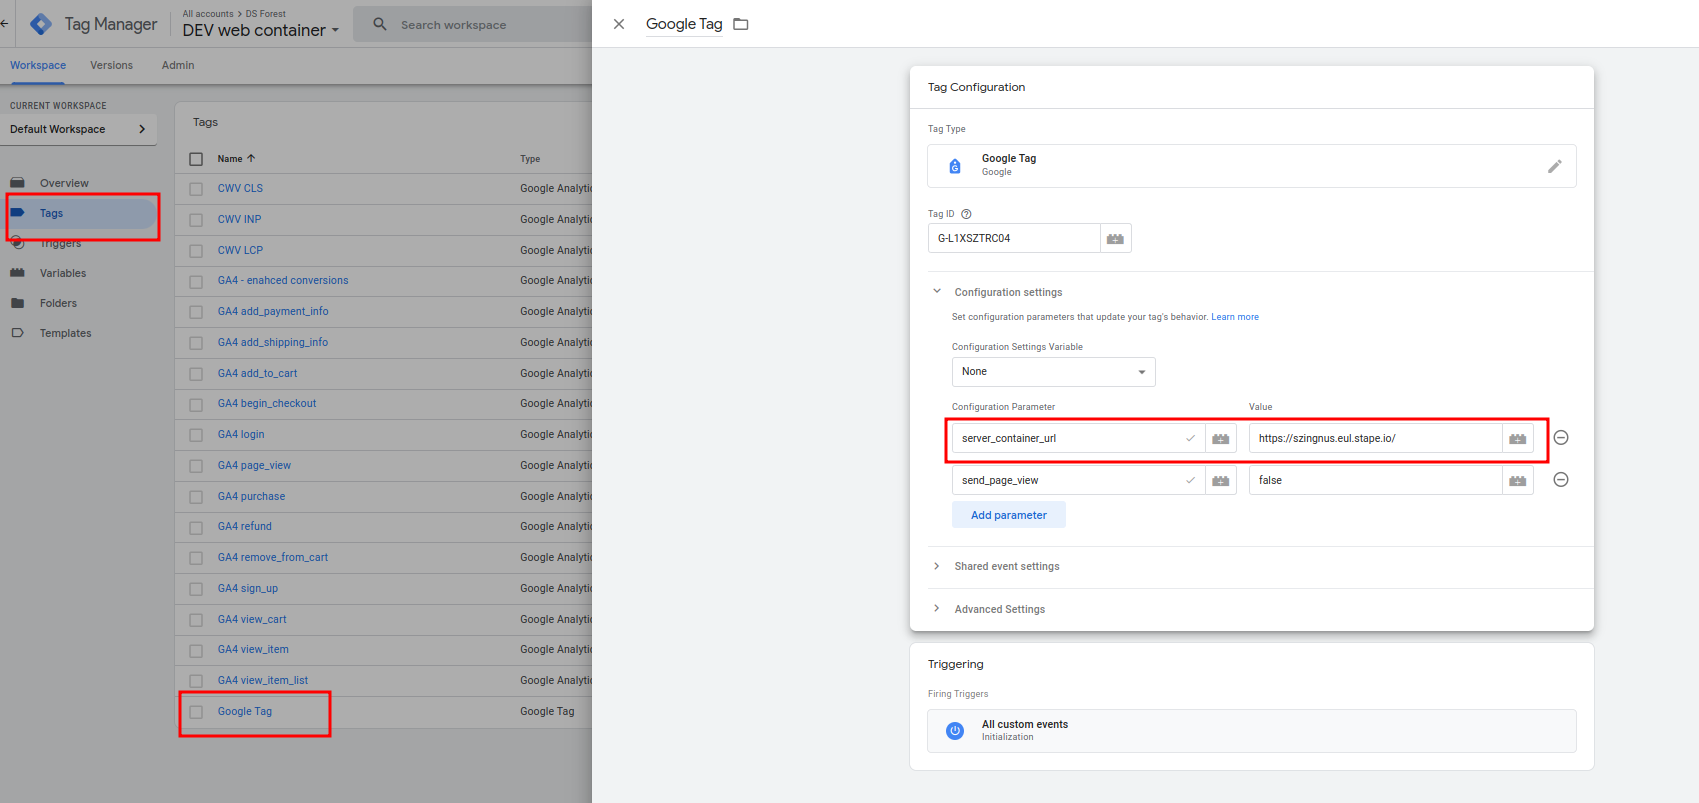
Configure Google Tag:
- Go to Tags > Choose "Google Tag"
- Change the server_url to be the same as Stape tagging server URL
Update Server URL Variable: Go to Variables > Server URL and change the URL to the Stape URL.
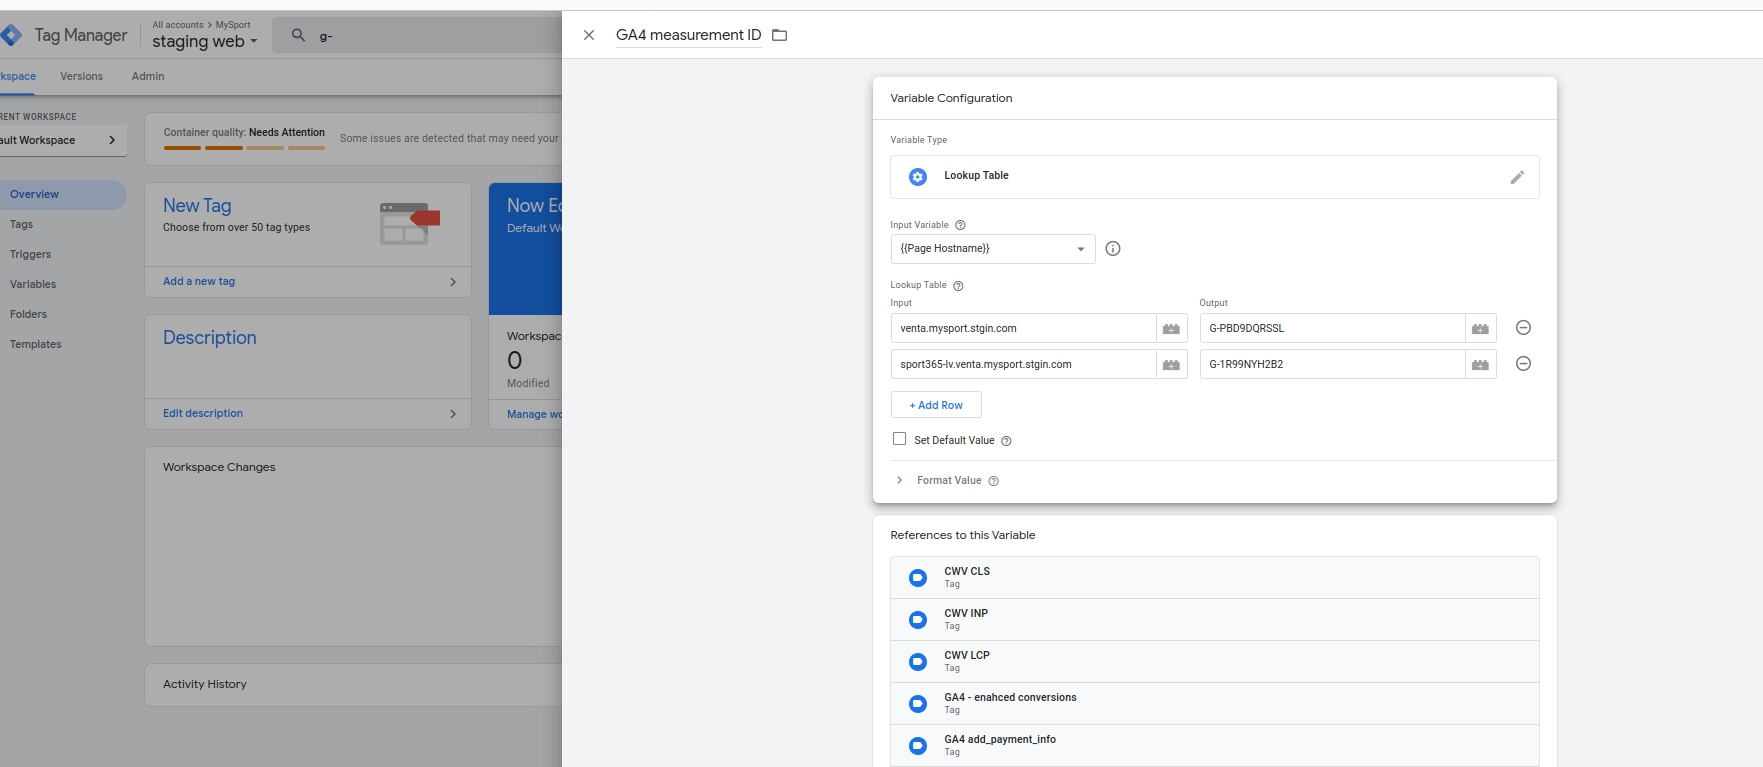
Configure Measurement IDs: In the search bar, search for "G-". If you have multi-website setup and the client wants separate GA4 properties for each website, enter the corresponding measurement ID linked by the domain.
Publish Web GTM: Submit > Publish.
Step 6: Configure Tracking Extension in Magento
Enable Extension:
- Enable extension in Magento configuration
- Choose "Server-side GTM" under "Tracking method"
- Enter the web GTM key
- Select all events (CWV and user engagement events are optional)
- Select "yes" to load gtag.js using first party
- For now, leave the preview header empty
Configure Server-Side GTM Endpoint: In the Server-side GTM endpoint, enter the Stape tagging server URL.
Configure DataLayer Events: Under DataLayer > Events, select all conversion events (usually purchase event).
Configure Core Web Vitals: If you want to track CWV, select CLI, LCP, and INP. Under Core Web Vitals, select "Yes".
Enable Enhanced Conversions: Enable enhanced conversions and select "yes" for sending enhanced conversions through the dataLayer.
Flush Cache: Flush cache after configuration.
Step 7: Configure CSP Rules
Add CSP Rules: If you're using a tagging server that's not under your domain, add CSP rules to allow loading scripts and content.
Use Magebit CSP Extension: Use the Magebit CSP extension to easily configure this.
Alternative Method: Or add CSP rules in cps_whitelist.xml.
Step 8: Testing
Open Server-Side GTM Preview:
- Open the server-side GTM and press preview in the top right corner
- Click three dots > send event manually > copy preview header
- Paste header in Magento admin configuration, save and flush cache
Verify Tagging Server: A tagging server hosted by Stape should open. Start interacting with the website and you should see events coming in the GTM.
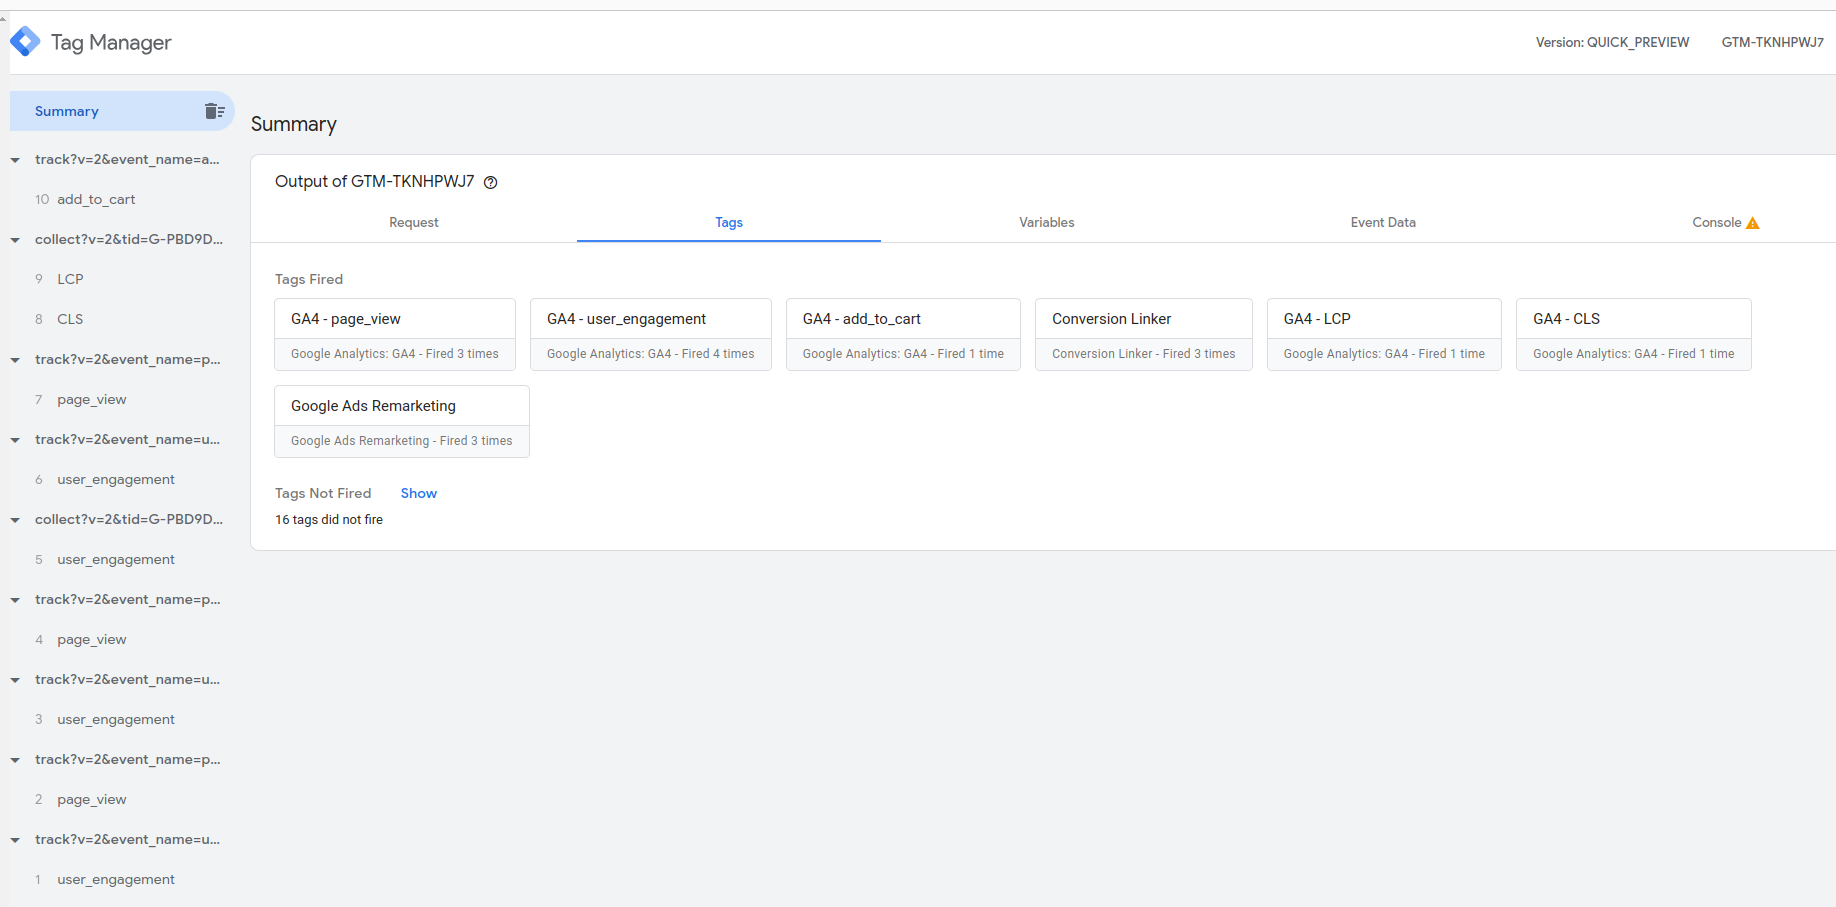
Event Types:
- Events with "collect" are coming from dataLayer
- Events with "track" are coming from server
Verify GA4: Click through events and under Event Data, review what's sent to GA4. Also check if events are received in GA4 real-time view.

Troubleshooting
Common Issues and Solutions
DataLayer Events Not Sent to GA4: Check for CSP issues in console.
GTM.js Not Loading: Check for whitespaces in Magento configuration.
Server-Side Events Not Sent: Check if preview header in preview mode matches the one in Magento.
No Server-Side Events:
- In Magento configuration, enable Measurement Protocol mode
- An API secret field will show up
- In GA4, generate an API secret under data sources
- Paste it in the configuration
Additional Support: If you still can't resolve the issues, contact the SEO team for help.